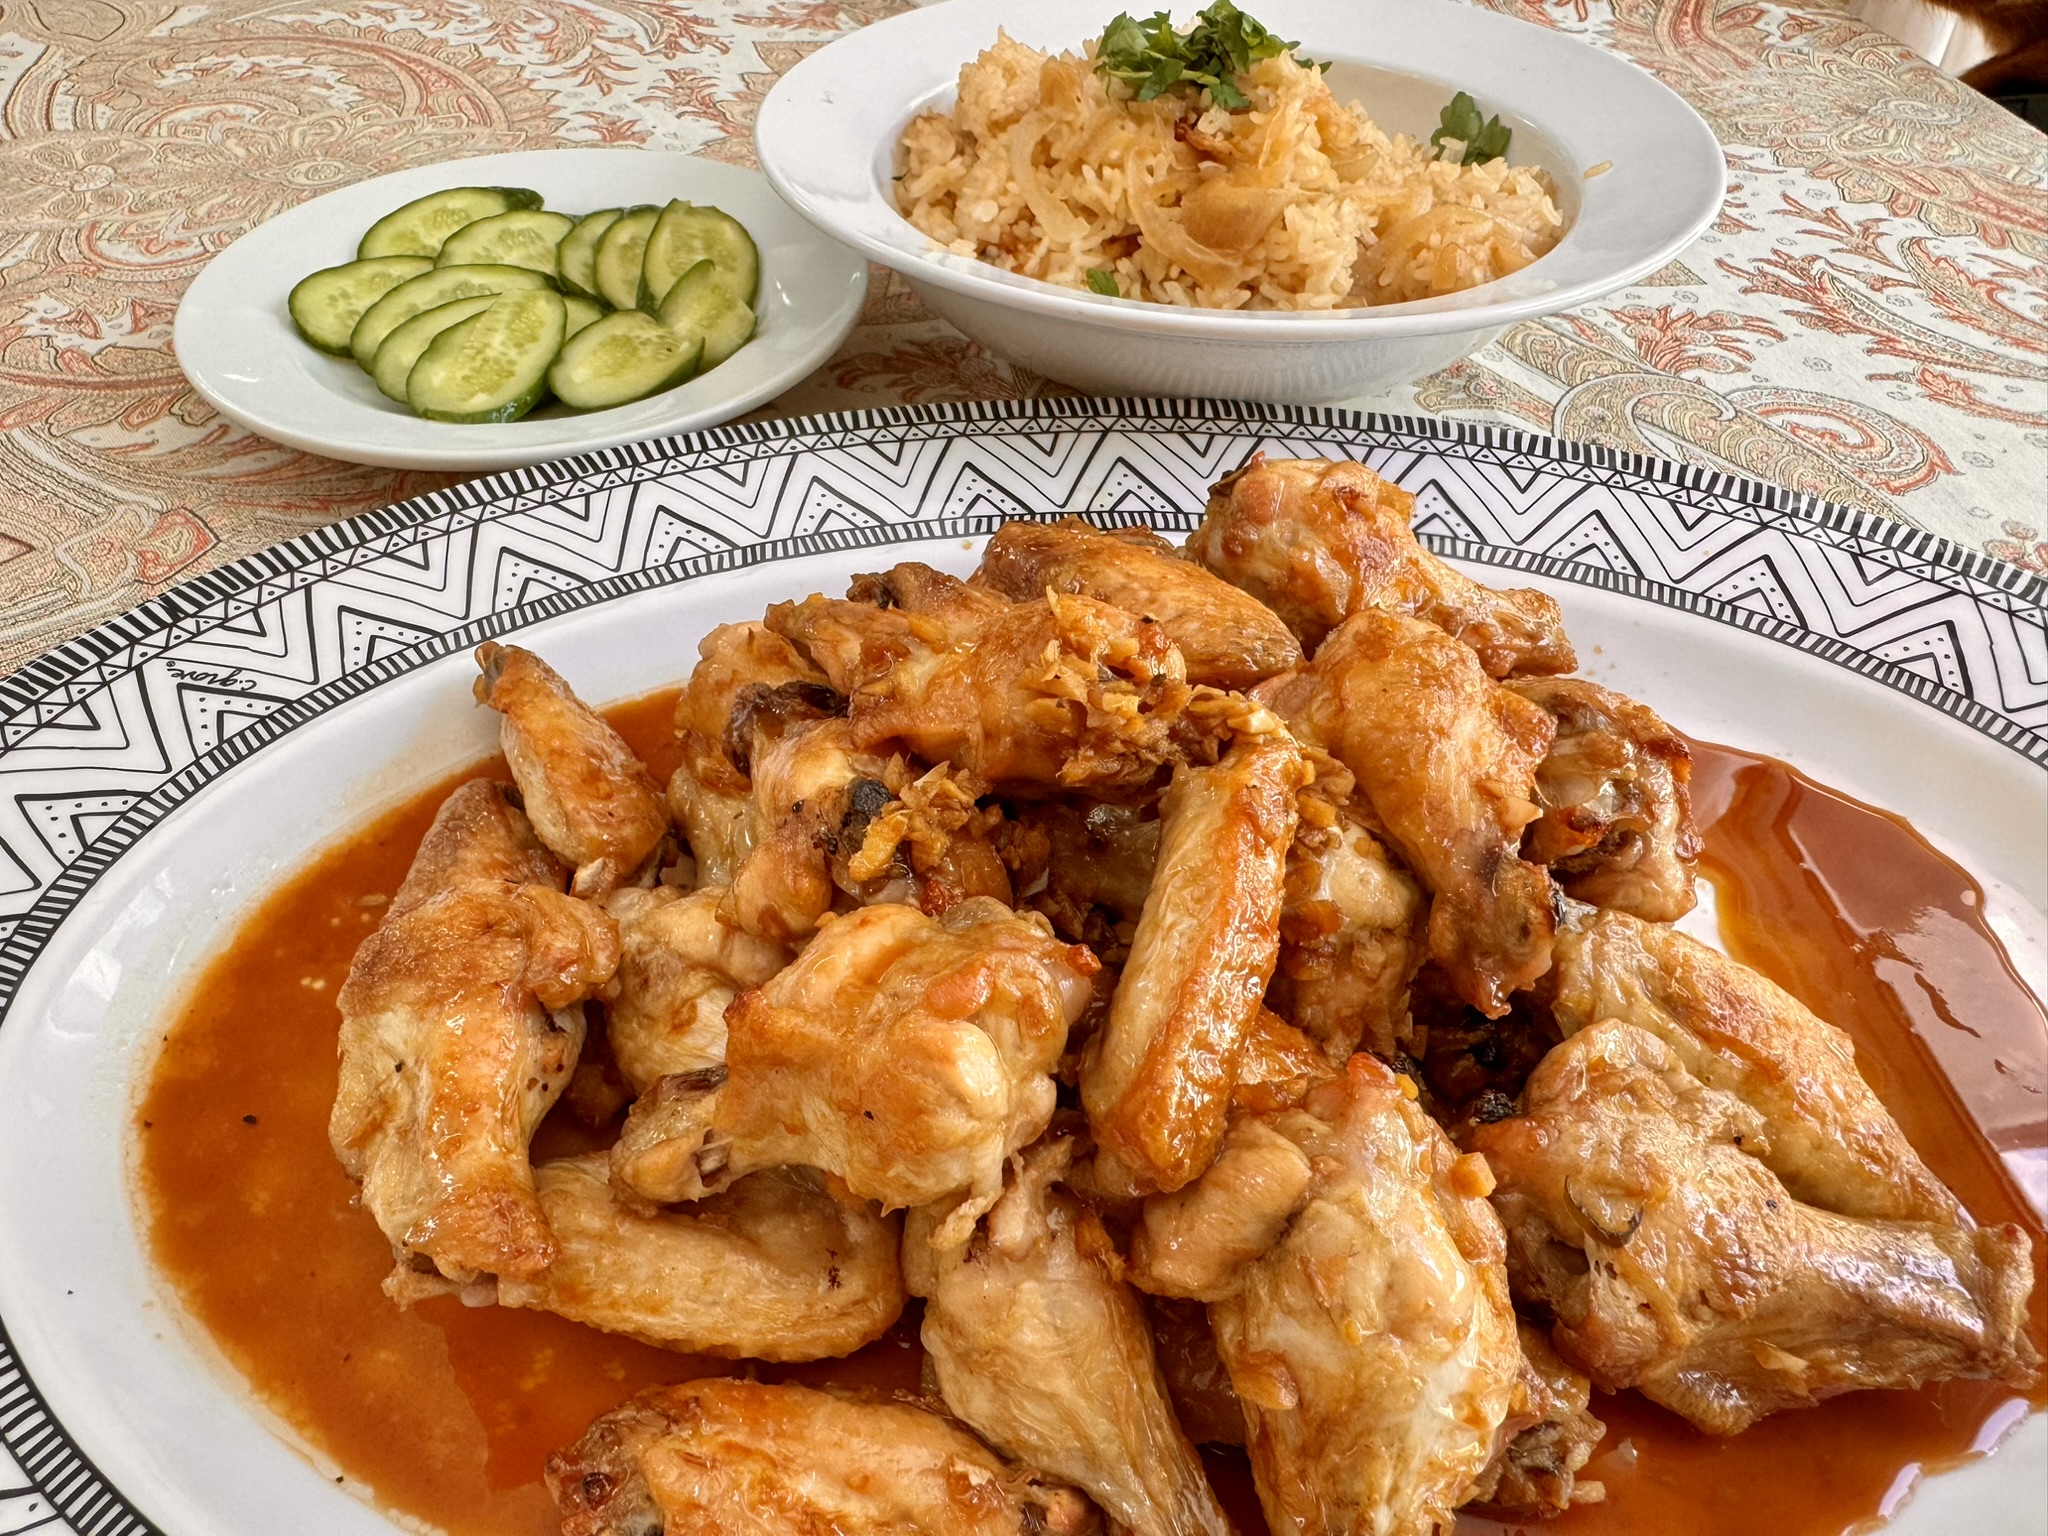
This chicken wing dinner was a smash hit, and the wings played so well with the sweet onion rice and those refreshing pickles. It’s awesome to have another killer chicken wing recipe in the mix, and this one is ridiculously easy!
Hello friends!
If you haven’t heard of Momofuku, it’s a New York City restaurant group founded by Chef David Chang. Lately, I’ve been seeing Momofuku and David Chang’s influence everywhere. It all began when I grabbed a jar of Momofuku Chili Crisp at my local grocery store and used it to create a Chili Crisp Fettuccine Alfredo with Spinach. You know that feeling when something new catches your attention, and suddenly it seems to be everywhere? That’s called the Baader-Meinhof phenomenon, or frequency illusion—your brain starts spotting it all over the place, even though nothing’s actually changed.
I had planned to make Japanese “Fried” Chicken from Azusa Oda’s Japanese Cookbook for Beginners: Classic and Modern Recipes Made Easy. Azusa’s recipes are refreshingly simple, and her take on chicken wings offers a healthier twist by baking them instead of frying. But since Azusa didn’t include a sauce for the wings, I decided to mash up her recipe with one of David Chang’s because his sauce is just too good to resist.
This recipe was adapted from David Chang’s Momofuku Cookbook and inspired by Azusa Oda’s Japanese “Fried” Chicken.

Japanese “Fried” Chicken – Momofuku Style
Ingredients
Equipment
Method
- Gather all the ingredients. Preheat the oven to 550°F (288°C). While the oven heats, line a baking pan with aluminum foil for easy cleanup and lightly spray a wire rack with oil. Place the chicken wings skin side down on the prepared wire rack. Once the oven reaches temperature, position the baking sheet on the middle rack and cook for 10 minutes. Keep a close eye on the chicken to avoid burning. If your oven runs hot or is smaller, consider broiling at 500°F (260°C) or lowering the rack.
- While the chicken wings are in the oven, combine all the ingredients for the sauce in a small saucepan. Bring it to a boil, stirring once in a while, and turn off the heat.
- Once the wings are cooked, transfer them to a large bowl. Pour some or all of the sauce over the wings and toss them until they are evenly coated. Serve the wings on a plate or in a large bowl. If you have any extra sauce, use it as a dipping sauce.
Notes


The side dish recipes are (slightly adapted) from Just One Cookbook Japanese cooking blog created by Namiko Hirasawa Chen with a focus on authentic and modern Japanese recipes. It’s a gem of a site to explore further Japanese recipes. The Hambagu recipe has already caught my interest!
Click here for Takikomi Gohan pronunciation.

Sweet Onion Takikomi Gohan
Ingredients
Equipment
Method
- Gather all the ingredients. Use a kitchen scale to measure rice if you have one.
- Rinse uncooked rice until the water is almost clear. Soak in water for 20-30 minutes. Drain well in a fine-mesh sieve for 10 minutes.
- Thinly slice ½ a sweet onion. I cut the onion against the grain, so the slices keep their shape and texture after they're cooked.
- In a frying pan heat 2 tsp neutral oil over medium heat. Add the onion and ⅛ tsp kosher salt and sauté the onion slices until they are tender. Add 2 Tbsp mirin and 1 Tbsp soy sauce. Continue to sauté until the sauce is thickened.
- Add the drained rice into the inner pot of a rice cooker and pour in the sauteed onion, including the sauce. Add the water up the 2 cup line on the inner pot. Press Start to cook. If you have a "Mixed Rice" option, use it. (see notes below)
- When the rice is finished cooking chop some parsley or green onion into small pieces and fluff up the rice with a rice paddle. Serve the rice and garnish.
Notes
Once the water is boiling, turn the heat to low and cook, covered, for 12–13 minutes.
When it’s done cooking, open the lid and take a quick peek to check if the water is completely absorbed. If there’s water left, close the lid and cook for a little longer.
Remove from the stove and let it steam with the lid on for another 10 minutes.
After 10 minutes, uncover the pot and fluff the rice with a rice paddle. It‘s now ready to serve. You can Keep the leftovers in a airtight container and store in the refrigerator for up to 3 days or in the freezer for a month. **Regular or Mixed Rice setting on a rice cooker: The main difference is that mixed rice setting will create a slightly charred rice called “Okage” on the bottom of the rice cooker. Takikomi Gohan (mixed rice) always has slightly charred rice from soy sauce in the seasoning, and many people enjoy the slightly charred rice.
This post may contain affiliate links, meaning I get a commission if you decide to make a purchase through my links, at no cost to you. Thanks for your support!

Japanese Pickled Cucumbers
Ingredients
Method
- Combine salt, sugar, and mustard (if using) in a resealable plastic storage bag and mix well together.
- Cut of ½ inch from the ends of the cucumber. Rub them together on the ends to get rid of the bitter taste.
- Put the cucumbers in the bag, squeeze out the air, and sel the bag thghtly. Rub the cucumbers well with the mixture. Pickle for a few hours (my preferred taste) or up to 1-2 days in the refrigerator.
- When the cucumbers are ready, discard the liquid and slice the cucumber before serving. Store the cucumbers in the refrigerator and consume within 2-3 days after removing from the pickling solution.
Notes
- Add Some Heat: Incorporate a bit of chili crisp or sliced fresh chili peppers for a spicy kick.
- Aromatic Twist: Add a few slices of fresh ginger or a sprinkle of toasted sesame seeds for extra flavor.
- Citrus Zing: Adding a bit of lemon zest can add a refreshing citrus note.

If you enjoyed this recipe and would love to see more, join me on YouTube and Instagram! Please comment, like, and share. It really helps! I would love to hear from you 🙂 And if you made any of these recipes, how did it go for you?
6 responses to “Japanese Fried Chicken – Momofuku Style + Sweet Onion Takikomi Gohan Dinner”
Java Bean: “Ayyy, if you snag one, James T., let us know how it tastes!”
What an excellent post! Reading it was really educational for me. You provided extremely well-organized material, and your explanations were both clear and brief. Your time and energy spent on this article’s research and writing are much appreciated. Anyone interested in this topic would surely benefit from this resource.
My favorite😍
Thank you! Namaste!
hi… loved the clip of toshiro mifune at the end! Q: have you tried marinating the wings and then baking them? Or baking themwith sauce on them? [the marinade will still be edible as a sauce as long as it’s boiled a bit after being used on the raw chicken]. just found your site while googling raspberry chocolate cobbler! so far have only looked at “lunch” — & looks like there are lots of nice recipes.
Hi Karen — so glad you’re here! And yes, that Toshiro Mifune clip is such a good one.
I haven’t tried marinating and baking the wings. This recipe blends Azusa Oda’s lighter baked method with David Chang’s sauce and tossing style, so I kept it simple and skipped the marinade step. I also haven’t seen any Momofuku versions that use a marinate → bake → reduce approach.
Thanks for the great question — and hope you enjoy exploring the recipes.